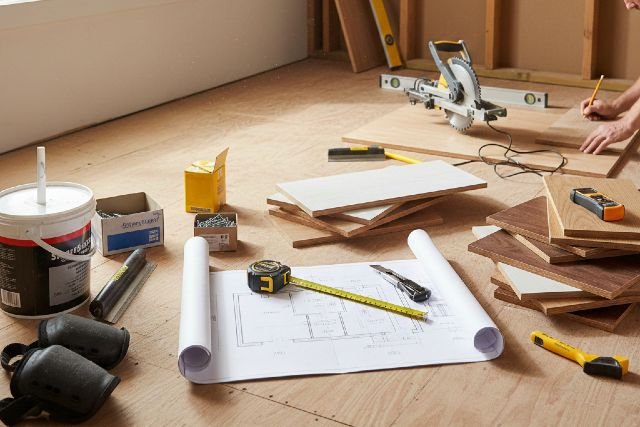
When it comes to new flooring, most problems don’t happen because people pick the wrong color or finish. They happen because the floorboards weren’t planned properly before installation. Planning floorboards is the step that protects you from expensive surprises like uneven planks, squeaks, gaps, buckling, moisture damage, or a finish that looks completely different once installed under real lighting. The good news is that planning floorboards doesn’t have to feel technical or overwhelming. Once you know what to measure, what to check, and what to prepare, you can avoid the most common mistakes and install a floor that looks great and lasts for years.
- What “Planning Floorboards” Really Means
- Choosing the Right Floorboard Type for Your Space
- The Space Check: Before You Buy Anything
- Measuring the Room Correctly
- Subfloor Preparation: The Silent Make-or-Break Factor
- Moisture Testing: The Step That Saves You Thousands
- Acclimation: Why Your Floorboards Need Time Before Installation
- Expansion Gaps: The Detail That Prevents Buckling
- Layout Planning: Direction, Focal Points, and Stagger Patterns
- Underlayment and Sound Control: What You Should Know
- Indoor Air Quality: Low-VOC Choices and Why They Matter
- Common Mistakes People Make When Planning Floorboards
- Real-World Example: How Planning Prevents Flooring Failure
- Frequently Asked Questions (FAQ) About Planning Floorboards
- Conclusion: Planning Floorboards Is the Shortcut to a Better Installation
This guide walks you through the full process of planning floorboards, from choosing the right material and calculating quantities to moisture testing, acclimation, layout strategy, and installation readiness. Whether you’re installing hardwood, engineered wood, laminate, or vinyl planks, the principles stay similar: successful floors are planned before the first plank is laid.
What “Planning Floorboards” Really Means
Planning floorboards is the process of preparing the space, materials, and installation strategy before the first plank goes down. It includes selecting the right type of floorboard for your lifestyle, checking the subfloor condition, controlling moisture and indoor climate, determining how the boards should run, calculating waste and extra planks, and confirming expansion gaps and transitions.
Think of it like building a kitchen. If you install cabinets before measuring the appliances, you may end up with a fridge that doesn’t fit. Flooring is similar. Your board choice might be perfect, but if moisture levels aren’t right or the layout isn’t planned, even premium materials can fail.
Choosing the Right Floorboard Type for Your Space
One of the most important steps in planning floorboards is choosing a material that fits the reality of your home, not just your Pinterest inspiration.
Solid Hardwood Floorboards
Solid hardwood is the classic option. It looks beautiful, can be refinished multiple times, and often adds perceived value. The trade-off is that it reacts more strongly to humidity swings and moisture, which means planning becomes crucial. Solid wood floors generally require stable indoor conditions and careful moisture management to avoid swelling, shrinking, or gapping. Guidance from wood flooring industry standards commonly emphasizes keeping wood flooring moisture content in the expected interior range, often around the 6–10% range depending on region and conditions.
Engineered Wood Floorboards
Engineered wood is made from layered construction that improves stability. It’s often a better choice than solid hardwood for condos, basements, or areas where humidity fluctuates, though it still needs moisture planning and acclimation.
Laminate Floorboards
Laminate is budget-friendly, scratch-resistant, and easy to maintain. Many laminate products are floating floors, meaning they “click” together and expand or contract based on temperature and humidity. Because of that movement, planning floorboards includes leaving the correct expansion space around edges and fixed objects.
Vinyl Plank Floorboards
Luxury vinyl plank is popular because many products are marketed as “waterproof,” but planning still matters. Vinyl expands and contracts too, and most manufacturers require expansion gaps, especially for floating installations. Installation resources commonly recommend leaving a perimeter gap often in the 1/4 inch to 3/8 inch range for floating plank floors, depending on product guidelines and space conditions.
The Space Check: Before You Buy Anything
A lot of people start planning floorboards by shopping first. Professionals usually do the opposite. They evaluate the room, subfloor, moisture, and climate first, because those factors determine what flooring will actually perform well.
Start by thinking about the space in realistic terms. Is it a kitchen where spills happen? A hallway with heavy foot traffic? A bedroom where comfort matters more than durability? A basement where moisture is always a risk? Your answers will guide which floorboard type makes sense.
Also consider sunlight exposure. Rooms with large windows heat up and cool down more quickly, which can stress floating floors if expansion gaps are ignored. If you’re installing boards through multiple connected rooms, planning floorboards also means deciding where transitions should go to allow movement and prevent pressure buildup.
Measuring the Room Correctly
Accurate measurement is the foundation of planning floorboards. Most people know they need the room’s length and width, but what they forget are closets, alcoves, hallways, and irregular wall angles.
A professional approach is to measure the room in sections and calculate total square footage. Then factor in “waste,” which includes cutting loss, plank defects, stagger pattern needs, and future repair stock. The more complex the room shape, the more waste you should plan for.
Even if you hire installers, doing these measurements yourself helps you spot mistakes early. Overbuying can be expensive, but underbuying can be worse because dye lots and manufacturing batches can vary, resulting in a noticeable mismatch later.
Subfloor Preparation: The Silent Make-or-Break Factor
If planning floorboards had a “most ignored but most important” category, subfloor preparation would win.
Your floorboards will only be as good as the surface underneath them. A subfloor that is uneven, soft, damp, or dirty can create movement, gaps, squeaks, and visible imperfections.
The subfloor should be clean, flat, and structurally sound. If there are dips or high spots, they should be corrected before installation. Many flooring manufacturers require flatness within a certain tolerance, especially for vinyl and laminate planks, because rigid products can telegraph unevenness and cause locking systems to fail over time.
Moisture Testing: The Step That Saves You Thousands
Moisture is one of the biggest reasons floors fail. Even “water-resistant” floors can fail if moisture is trapped underneath, especially if installed over concrete.
For concrete slabs, many flooring professionals rely on in-situ relative humidity testing guided by recognized standards like ASTM F2170 to measure moisture conditions inside the slab. ASTM F2170 is widely referenced as a method for determining relative humidity in concrete floor slabs using probes placed in the slab, helping installers assess whether the slab is dry enough for flooring.
For wood subfloors and hardwood materials, moisture content should also be checked using a moisture meter. The National Wood Flooring Association (NWFA) publishes acclimation and moisture guidance and commonly references typical interior wood moisture levels around the 6–10% range depending on region and conditions.
If this part of planning floorboards feels “too technical,” remember this: moisture problems don’t show up on day one. They show up a few weeks or months later, when the floor begins to cup, buckle, gap, or lose adhesion.
Acclimation: Why Your Floorboards Need Time Before Installation
Acclimation is the process of letting floorboards adjust to the temperature and humidity of the installation space before they are installed. Skipping this step is one of the easiest ways to create future gaps or buckling.
Industry guidance frequently emphasizes that wood flooring should reach equilibrium with the environment before installation, and many manufacturers commonly produce wood flooring within a typical moisture content range around 6% to 9%.
Planning floorboards properly means you don’t just bring the boxes inside and stack them in a garage. You store them inside the conditioned space where they’ll be installed, following the manufacturer’s recommendations for packaging and airflow.
The goal isn’t a magic number of days. The goal is stability. A moisture meter can confirm whether the boards have reached the expected range for your indoor environment.
Expansion Gaps: The Detail That Prevents Buckling
Expansion gaps are small spaces left around the perimeter of the room and around fixed objects like cabinets, pillars, or door frames. These gaps allow floating floors and even some wood floors to expand and contract naturally.
Even rigid core “waterproof” floors still move with temperature and humidity changes, which is why industry installation guidance often stresses expansion space for floating floors of all types.
Many common installation resources recommend a perimeter expansion gap in the range of about 1/4 inch to 3/8 inch for floating plank floors, although the exact requirement should always come from your specific product instructions.
Planning floorboards without planning expansion gaps is like installing shelves with no room for the wall to settle. It may look perfect at first, but movement will eventually reveal the mistake.
Layout Planning: Direction, Focal Points, and Stagger Patterns
This is where planning floorboards becomes more creative and design-focused. The direction you run your boards changes how the room looks and feels.
Many homeowners choose to run floorboards lengthwise along the longest wall to make the room feel larger. Others prefer to run boards toward a window so light naturally highlights the grain. In open-plan spaces, the best approach often balances aesthetics with practical transitions between rooms.
Stagger patterns matter too. Plank floors typically look best when end joints are offset in a random or semi-random pattern, avoiding stair-step repeats. Planning this before installation helps you avoid awkward seams in high-visibility areas.
A practical tip is to “dry lay” a few rows to visualize how it will look, especially near doorways, kitchen islands, and hallways. This is one of the simplest planning floorboards habits that professionals use to avoid regret.
Underlayment and Sound Control: What You Should Know
Underlayment isn’t just padding. It influences moisture protection, sound reduction, comfort underfoot, and the long-term stability of your floor.
For laminate and vinyl floating floors, underlayment requirements vary by product. Some planks include built-in underlayment, while others require a separate layer.
For installations over concrete, planning floorboards often includes a vapor barrier strategy. If moisture vapor rises from the slab and gets trapped, it can damage the flooring or cause microbial issues. This is why concrete moisture testing standards like ASTM F2170 are commonly referenced for pre-installation evaluation.
If you’re in a multi-story building or apartment, sound control becomes a major factor. Some building management rules even specify minimum sound ratings, so it’s worth checking before purchase.
Indoor Air Quality: Low-VOC Choices and Why They Matter
Flooring isn’t just a visual upgrade. It can impact indoor air quality, especially during and after installation.
The U.S. Environmental Protection Agency (EPA) notes that volatile organic compounds (VOCs) are emitted as gases from certain solids and liquids, and that VOC concentrations can be significantly higher indoors than outdoors.
Planning floorboards with health and comfort in mind means paying attention to low-VOC adhesives, finishes, and certified products. This is especially important if you have children, pets, allergies, or asthma.
If you’re using adhesives or coatings, good ventilation during installation and curing is one of the simplest ways to reduce short-term VOC exposure.
Common Mistakes People Make When Planning Floorboards
Most floorboard issues trace back to a small set of planning mistakes. The biggest one is buying based on appearance alone and ignoring moisture, subfloor condition, and installation requirements.
Another mistake is not accounting for transitions. If you’re changing flooring types between rooms, you need a clean transition plan so you don’t end up with uneven height differences or awkward thresholds.
People also underestimate how lighting affects color. A floorboard that looks warm in a showroom can look much cooler at home. Planning floorboards includes testing samples in your real lighting, in both day and evening conditions.
Finally, many people skip reading the manufacturer installation guide. Even excellent installers follow the manufacturer’s specific rules, because warranty coverage often depends on proper installation practices.
Real-World Example: How Planning Prevents Flooring Failure
Imagine a homeowner installing engineered wood over a concrete slab in a humid climate. The boards arrive, and installation begins the next day to meet a tight schedule.
Two months later, the floor starts cupping. The boards feel slightly raised at the edges, and the floor develops soft, hollow spots. What happened?
In many cases, this kind of problem traces back to moisture vapor from the slab and insufficient acclimation. Concrete holds moisture for a long time, and ASTM-referenced testing methods like F2170 exist because surface dryness isn’t enough to ensure the slab is ready.
Planning floorboards properly in this situation would include moisture testing, acclimation confirmation, and a vapor barrier strategy. Those steps may add time upfront, but they protect you from a costly tear-out later.
Frequently Asked Questions (FAQ) About Planning Floorboards
What does planning floorboards mean?
Planning floorboards means preparing your room, subfloor, moisture conditions, board layout, and installation strategy before installing any planks. It helps prevent problems like gaps, buckling, squeaks, and premature damage.
How far in advance should I plan floorboards before installation?
Ideally, planning should start before purchasing materials. You’ll want time to measure accurately, confirm subfloor condition, and plan for acclimation if installing wood floors.
Do I need to acclimate floorboards before installation?
Yes, especially for hardwood and engineered wood. Industry guidance commonly notes that wood flooring should reach equilibrium with the room environment, often aligning with typical moisture content ranges like 6–9% for many manufactured wood flooring products.
How do I prevent floorboards from buckling?
Prevent buckling by controlling indoor humidity, testing moisture in the subfloor, following acclimation requirements, and leaving proper expansion gaps around the room perimeter and fixed objects.
Is moisture testing really necessary?
Yes. Moisture is one of the most common causes of flooring failure. Standards like ASTM F2170 are widely used for evaluating moisture in concrete slabs before installing flooring.
Conclusion: Planning Floorboards Is the Shortcut to a Better Installation
The easiest way to get a floor you love for the long term is to treat planning floorboards as the most important part of the project, not a quick step you rush through. When you measure correctly, test moisture, allow acclimation, plan layout and transitions, and follow expansion gap requirements, you prevent the most common failures before they happen.
Whether you’re installing hardwood, engineered wood, laminate, or vinyl planks, the planning stage is what separates a floor that looks good for a year from a floor that performs beautifully for a decade. If you want the installation to feel smooth, the finish to look professional, and the investment to last, planning floorboards is where it all begins.